Handmade Photo Charm Bracelets

Handmade Photo Charm Bracelets
Try making a some handmade charm photo bracelets! These are fun and easy to make!
Grab your favorite photos and make a fun photo charm bracelet! These are super cute for Mom’s or even Grandma’s too! They love to show off their little ones!

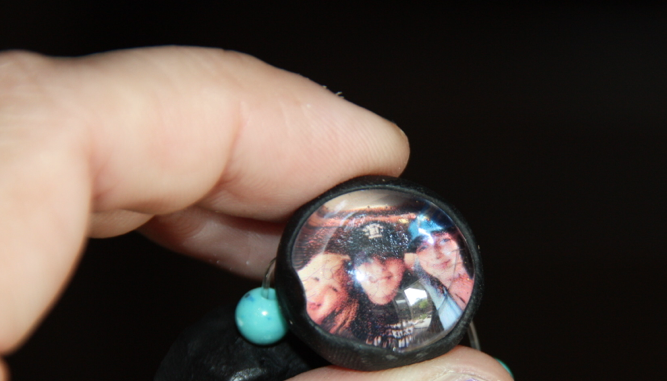
These photos really don’t do this project justice. They look much more clearer in person:
Here’s what you need to make your handmade photo charm bracelet:
- Sculpey Polymer clay (just like this set on Amazon)
- Small photos
- Flat Glass marbles (like this one or even these. I’ve also seen them at Walmart or any craft store)
- Super Glue (clear)
- Stretch Jewelry Cord (clear)
- Pottery Tool Set (Optional but it makes it easy. You could use a stick pin also)
- jewelry beads (Tip: look through your jewelry box and see if you already have some beads from another piece of jewelry you no longer wear. Often times I find the most beautiful glass bead necklaces at garage sales!)
- Scupley Glaze (optional)
- Hair Blow Dryer
Directions for your handmade photo charm bracelet:
First, cut out your small photos to fit the back of the flat marble glass bead. The cuts don’t have to be perfect because you will only see the center of the photo through the glass.
Next, Glue the photo side to the back of the flat marble. One side of the marble is flat and one side is a bit rounded. Make sure you are gluing it to the flat side.
Take your favorite color of Sculpey clay and mold it around the bottom side of the flat marble and only 3/4 the side of the marble. Make sure it’s not too thin on the sides or else it will just chip off when it’s done. The bottom will need to be thick enough for you to be able to stick a needle (or safety pin) through it to make the hole for the cord. Make sure the cord can fit through it. If the cord is bigger than the hole you can always move the pin in a circular motion to make the hole slightly bigger. (I had to do this).
The clay now has to be heated to make it set (hard). I did not put it in an oven as suggested. I was too worried it would melt my photo. Instead I grabbed my hair blow dryer and heated it up. Keep blow drying it until it gets hard. I wanna say mine took about 5 minutes. Be sure to move it all around so you don’t miss hardening the sides of the bead.
If you decide you want a glossy finish you can easily apply the glaze after you have heated the bead. This glaze can be added to cured or non cured clay.
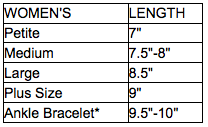
Sizing your handmade photo charm bracelet
Most bracelets are between 7 to 9 inches in length. I think the easiest way to measure the bracelet is to put the cord around the completed photo beads and tighten it until it feels right for you. This is exactly what I did.
I have found that 5 flat marble beads with a small decorative bead in between the bracelet work perfectly for small sized bracelets. You can use a slightly bigger decorative bead on the medium bracelets and for the large bracelet you want to use six photos with any size bead. I’ve illustrated this in the photo above by showing multiple bracelets that I made.
Knots
The stretchy jewelry cord can be a bit tricky. You don’t want to just tie a simple knot. You want to double knot it or even triple knot it. By this I mean tie one knot but instead of pulling it tight to finish the knot put the end through the same exact know hole again. I do this three times to create a super strong hold on that knot. It works every time!
 Surgeon’s knot by Beading Times
Enjoy!